Welcome to part 4 of my blog series about the network configuration that I build for my VyOS routers! In part 1 I gave a design overview followed by part 2 with the firewall, DHCP, DNS, and NTP configuration. In the third part I configured the interfaces and added VRRP. In this part, I will dive into the world of remote connections.
Interested in the complete story and configuration? You can find all parts of this blog series listed here once they are online:
Site-to-Site IPSec VPN
As stated in the design, my home network must be connected -in a secure and redundant manner- to the VyOS routers of my lab. This communication needs to be secure as it links two private networks via the “untrustworthy” internet. The technique that I’ve decided to use is called a ‘Site-to-Site IPSEC tunnel‘ which provides a permanent and encrypted tunnel between the networks via open standards. The encryption types used in the configuration are not -at the strongest they can be, but I noticed that the Ubiquiti UniFi Security Gateway (USG) -my home router- becomes really slow when using any stronger encryption. At this moment I’m not replacing my home router- so for now, this will have to do.
To ensure the required redundancy, the Site-to-Site tunnel will use the WAN IP-address that is linked to the VRRP group on the VyOS routers. This will have the effect that the tunnel will move with the master/slave configuration making it redundant. Both VyOS routers can use the same configuration for the Site-to-Site tunnel as it’s always using the same endpoints, simplifying configuration massively. In the configuration, I redacted the IP-address of my home router by replacing it with xx.xx.xx.xx.
» Click here to show the Site-to-Site IPSEC VPN configuration
set interfaces vti vti64 address '10.255.200.1/30'

set vpn ipsec esp-group ESP_XX.XX.XX.192 compression 'disable'
set vpn ipsec esp-group ESP_XX.XX.XX.192 lifetime '3600'
set vpn ipsec esp-group ESP_XX.XX.XX.192 mode 'tunnel'
set vpn ipsec esp-group ESP_XX.XX.XX.192 pfs 'dh-group19'
set vpn ipsec esp-group ESP_XX.XX.XX.192 proposal 10 encryption 'aes128'
set vpn ipsec esp-group ESP_XX.XX.XX.192 proposal 10 hash 'sha1'
set vpn ipsec ike-group IKEv2_XX.XX.XX.192 dead-peer-detection action 'hold'
set vpn ipsec ike-group IKEv2_XX.XX.XX.192 dead-peer-detection interval '30'
set vpn ipsec ike-group IKEv2_XX.XX.XX.192 dead-peer-detection timeout '120'
set vpn ipsec ike-group IKEv2_XX.XX.XX.192 ikev2-reauth 'no'
set vpn ipsec ike-group IKEv2_XX.XX.XX.192 key-exchange 'ikev2'
set vpn ipsec ike-group IKEv2_XX.XX.XX.192 lifetime '10800'
set vpn ipsec ike-group IKEv2_XX.XX.XX.192 mobike 'disable'
set vpn ipsec ike-group IKEv2_XX.XX.XX.192 proposal 10 dh-group '19'
set vpn ipsec ike-group IKEv2_XX.XX.XX.192 proposal 10 encryption 'aes128'
set vpn ipsec ike-group IKEv2_XX.XX.XX.192 proposal 10 hash 'sha1'
set vpn ipsec ipsec-interfaces interface 'eth0'
set vpn ipsec nat-networks allowed-network 0.0.0.0/0
set vpn ipsec nat-traversal 'enable'
set vpn ipsec site-to-site peer XX.XX.XX.XX authentication mode 'pre-shared-secret'
set vpn ipsec site-to-site peer XX.XX.XX.XX authentication pre-shared-secret 'redected'
set vpn ipsec site-to-site peer XX.XX.XX.XX connection-type 'initiate'
set vpn ipsec site-to-site peer XX.XX.XX.XX ike-group 'IKEv2_XX.XX.XX.192'
set vpn ipsec site-to-site peer XX.XX.XX.XX ikev2-reauth 'inherit'
set vpn ipsec site-to-site peer XX.XX.XX.XX local-address 'XX.XX.XX.192'
set vpn ipsec site-to-site peer XX.XX.XX.XX vti bind 'vti64'
set vpn ipsec site-to-site peer XX.XX.XX.XX vti esp-group 'ESP_XX.XX.XX.192'
With this configuration in place, let’s take a look at the configuration that is needed for my home router, the Ubiquiti USG.
Ubiquiti UniFi Security Gateway
As a home router, I’ve chosen to go for a Ubiquiti USG. Via an external Graphical User Interface (GUI) -a so-called cloudkey- there are loads of options to configure the router. The Ubiquiti USG has no Wi-Fi and is completely focused on doing one task only and that is being a Secure Gateway. As stated in one of my previous blogs, Ubiquiti and VyOS share quite some DNA which makes configuring quite similar.
Via the cloudkey I’ve started to set up the Site-to-Site tunnel and I made sure that I turned on the checkmark for ‘Dynamic Routing‘ as this will create a Virtual Tunnel Interface (VTI) that I will need later. Most configuration options are possible via the GUI sadly advanced configurations like giving the VTI an IP-address are only available via the CLI. I’ve configured the advanced options via the Command Line Interface (CLI) but they continuously get overwritten with every configuration change in the GUI which makes me configure it often.
I started to search how to make the advanced configuration permanent and with the help of the Ubiquiti help pages, I learned how to do that. Apparently, the first step is to configure the Ubiquiti USG via the CLI and then I exported that configuration to a JSON file. From that JSON file, I got the snippets that I actually need and via ssh, I logged into the UniFi cloudkey to create the needed file at ‘/usr/lib/unifi/data/sites/default/config.gateway.json‘. When I installed the cloudkey I didn’t change the default site name, so that’s the default but this could be different for you!
» Click here to show the the config.gateway.json
In the end the file look like this for me:
# cat /usr/lib/unifi/data/sites/default/config.gateway.json
{
    "interfaces": {
        "vti": {
            "vti65": {
                "address": [
                    "10.255.200.2/30"
                ],
                "mtu": "1436"
            }

        }
    },
    "protocols": {
        "bgp": {
            "65510": {
                "aggregate-address": {
                    "10.0.0.0/16": "''"
                },
                "neighbor": {
                    "10.255.200.1": {
                        "remote-as": "65500",
                        "soft-reconfiguration": {
                            "inbound": "''"
                        },
                        "update-source": "10.255.200.2"
                    }
                },
                "parameters": {
                    "router-id": "10.255.200.2"
                },
               "redistribute": {
                    "connected": "''"
                }
            }
        }
    },
    "service": {
        "dns": {
            "forwarding": {
                "options": [
                    "server=/wheatley.local/10.10.99.10",
                    "server=10.10.10.5"
                ],
                "cache-size": [
                    0
                ]
            }
        }
    }
}
With the configuration in place the VTI gets the IP-address “10.255.200.2” but why do I need a VTI with an IP-address? Well, I also want to use a ‘dynamic routing protocol‘ to exchange routing information. This works by building a neighbour relationship between two routers which is based on an IP-address. Also in the past, I had some difficulty setting up the exchange of routing because the Maximum Transmission Unit (MTU) needs to be lowered. This is because the IPSEC protocol adds a few additional bytes to the packet making it too big for de default MTU -1500 bytes- and it will only work by lowering the MTU.
When I now use the ‘force provision’ option in UniFi, I can clearly see that the VTI interface is up and configured exactly as I wanted. Next, I checked the status of the VTI and it shows as ‘up’ which is what I want to see at this point. Now let’s check the same at the side of the EU-GW04, I can see that the tunnel is up and the tunnel has been up for over two hours. This uptime is better than I got so far with the previous VyOS 1.3 ‘nightly build‘ so I’m very positive about the stability of the network.
UBNTUSG01:~$ show interfaces
Codes: S - State, L - Link, u - Up, D - Down, A - Admin Down
Interface IP Address S/L Description
--------- ---------- --- -----------
<<< output omitted >>>
vti65 10.255.200.2/30 u/u
EU-GW04:~$ show vpn ipsec sa
Connection State Up Bytes In/Out Remote address Remote ID Proposal
----------------------------- ------- ------- -------------- ---------------- ----------- ----------------------------------------------
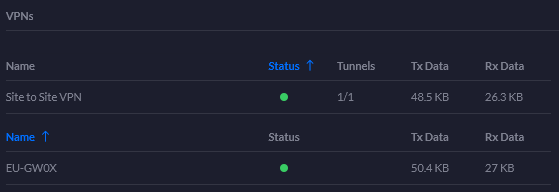
peer-XX.XX.XX.XX-tunnel-vti up 2 hours 125K/68K XX.XX.XX.XX N/A AES_CBC_128/HMAC_SHA1_96/PRF_HMAC_SHA1/ECP_256I’m not completely happy with the current configuration of the Ubiquiti though. The reason for that is that the Ubiquiti USG is announcing way too many IP-ranges. To fix this it’s possible to filter the IP-ranges that a router announces. However, I’d like to prevent the use of an import and export filter on the Ubiquiti side because I want to keep the intelligence of the network as much as possible on the VyOS router. Sadly, I didn’t find a nice way of applying filters yet but the current configuration still works well. With the CLI showing that the tunnel is up, I’m wondering if the GUI also shows this status as I did quite some manual configuration. Luckily it shows the status as green as shown in the image.
Layer 2 Tunneling Protocol VPN
In the design, I’ve stated that I want to be able to remotely connect to the network from any location that has a working internet connection. For me, this is essential to reach VM’s but can also be used when I’m on holiday to tunnel my traffic to a point in the Netherlands or when connected to an untrusted Wi-Fi connection. This possibility will be realized by using the Layer 2 Tunneling Protocol (L2TP) in combination with a centralized user account.
The AD server is responsible for any user authentication in the lab and I also would like to use those credentials for the VPN. To realize this I configured the AD server as ‘Network Policy Server‘ (NPS) for the use of ‘Remote Authentication Dial-In User Service‘ (RADIUS) so that the VyOS routers can verify credentials inputted by the user.
» Click here to show the the L2TP configuration
set vpn ipsec ipsec-interfaces interface 'eth0'
set vpn ipsec nat-networks allowed-network 0.0.0.0/0
set vpn ipsec nat-traversal 'enable'

set vpn l2tp remote-access authentication mode 'radius'
set vpn l2tp remote-access authentication radius server 10.10.99.10 key 'redated'
set vpn l2tp remote-access authentication radius source-address '10.10.99.254'
set vpn l2tp remote-access authentication require 'mschap-v2'
set vpn l2tp remote-access client-ip-pool start '10.255.10.10'
set vpn l2tp remote-access client-ip-pool stop '10.255.10.254'
set vpn l2tp remote-access dns-servers server-1 '10.10.10.5'
set vpn l2tp remote-access ipsec-settings authentication mode 'pre-shared-secret'
set vpn l2tp remote-access ipsec-settings authentication pre-shared-secret 'redated'
set vpn l2tp remote-access outside-address 'XX.XX.XX.192'
I saved the configuration and started by adding the L2TP-tunnel to my Windows 10 laptop and then start connecting and eventually test the connection with tracert again.
C:\WINDOWS\system32>tracert -d 8.8.8.8
Tracing route to 8.8.8.8 over a maximum of 30 hops
1 37 ms 39 ms 29 ms 10.255.255.0 <>
2 41 ms 38 ms 38 ms XX.XX.XX.XX <>
< So something funky is going on, did you spot it? In the configuration, I told the L2TP tunnel to use IP-addresses from 10.255.10.10 to 10.255.10.254 but the tracert shows that VyOS router uses 10.255.255.0 to communicate with the VPN client. In the beginning, I used that IP-address for the Site-to-Site tunnel and it didn’t work, this explains it as an IP-address must, normally, be unique in a network. I haven’t tested with ‘set vpn l2tp remote-access dhcp-interface‘ yet. Maybe that configuration would work but I’ll save testing that for later.
Something else I found was that an Android phone by default tries to connect using the ‘Challenge-Handshake Authentication Protocol‘ or CHAP. But CHAP is not the most secure way of authentication -it requires that passwords are stored in the AD with reversible encryption. Even Microsoft discourages system administrators to use CHAP and this is also done by many security professionals. In the VyOS configuration, I made sure CHAT is not used but a newer MS-CHAP-v2 is forced by setting “authentication require 'mschap-v2‘”.
With the configuration, I can see that the connection from my mobile phone is being created and established.
EU-GW04:~$ show log vpn l2tp
Jan  4 13:41:30 EU-GW04 xl2tpd[80047]: Connection established to XX.XX.131.96, 46366.  Local: 30555, Remote: 65351 (ref=0/0).  LNS session is 'default'
Jan  4 13:41:30 EU-GW04 xl2tpd[80047]: Call established with XX.XX.131.96, Local: 34392, Remote: 53314, Serial: -1084367864
Jan  4 13:41:30 EU-GW04 pppd[100275]: Plugin radius.so loaded.
Jan  4 13:41:30 EU-GW04 pppd[100275]: RADIUS plugin initialized.
Jan  4 13:41:30 EU-GW04 pppd[100275]: Plugin radattr.so loaded.
Jan  4 13:41:30 EU-GW04 pppd[100275]: RADATTR plugin initialized.
Jan  4 13:41:30 EU-GW04 pppd[100275]: pppd 2.4.7 started by root, uid 0
Jan  4 13:41:30 EU-GW04 netplugd[1084]: ppp0: ignoring event
Jan  4 13:41:30 EU-GW04 pppd[100275]: Using interface ppp0
Jan  4 13:41:30 EU-GW04 pppd[100275]: Connect: ppp0 <--> /dev/pts/0
Jan  4 13:41:34 EU-GW04 netplugd[1084]: ppp0: ignoring event
Jan  4 13:41:34 EU-GW04 pppd[100275]: Unsupported protocol 'Compression Control Protocol' (0x80fd) received
Jan  4 13:41:34 EU-GW04 kernel: [62600.708454] l2tp0: renamed from ppp0
Jan  4 13:41:34 EU-GW04 Keepalived_vrrp[3324]: Interface name has changed from ppp0 to l2tp0
Jan  4 13:41:34 EU-GW04 pppd[100275]: Cannot determine ethernet address for proxy ARP
Jan  4 13:41:34 EU-GW04 pppd[100275]: local  IP address 10.255.255.0
Jan  4 13:41:34 EU-GW04 pppd[100275]: remote IP address 10.255.10.10
Jan  4 13:43:10 EU-GW04 pppd[100275]: LCP terminated by peer (User request)
Jan  4 13:43:10 EU-GW04 pppd[100275]: Connect time 1.6 minutes.
Jan  4 13:43:10 EU-GW04 pppd[100275]: Sent 83873 bytes, received 17862 bytes.
Jan  4 13:43:13 EU-GW04 pppd[100275]: Connection terminated.
Jan  4 13:43:13 EU-GW04 pppd[100275]: Modem hangup
Jan  4 13:43:13 EU-GW04 pppd[100275]: Exit.
Jan  4 13:43:13 EU-GW04 xl2tpd[80047]: call_close: Call 34392 to XX.XX.131.96 disconnected
Jan  4 13:43:18 EU-GW04 xl2tpd[80047]: Maximum retries exceeded for tunnel 30555.  Closing.
Jan  4 13:43:18 EU-GW04 xl2tpd[80047]: Connection 65351 closed to XX.XX.131.96, port 46366 (Timeout)
I now have to possiblity to always connect securly to my network, but one more to follow in this blog series! The next blog article will be about routing! For now, thanks for reading and hopefully you found it interesting and maybe even learned something new! Want to be informed about a new post? Subscribe! Any questions or just want to leave a remark? Please do, I’m very curious what you think of the content. Enjoy your day!